
Preparing your files for making stencils!
We have been getting quite a few questions through about stencilling so I thought I would write a short post to help you out with preparing your files to create a stencil.

Above is a quick diagram I put together to help explain what you need to keep in mind when designing a stencil. Here is a breakdown of the stencil elements:
Masking border
Try to allow enough space around the design you want to stencil, this allows for any wayward spray paint and helps you avoid any leaks.
Island
Islands are connected by bridges, this is to stop them floating away! If you haven't 'bridged' your islands then they will fall out of your stencil and the finished design won't look as you intended.
Bridge
Designs/islands need to be bridged as I mentioned above. The size and width of your bridges will depend on the material you wish to use and how intricate your design is. You won't want to have an intricate, fragile design with a huge, wide bridge, however, you won't want the bridge to be too narrow either of it might snap off. We always recommend you create bridges that are around 1mm thick for stencilling material such as Mylar, however, they may still cut if thinner but it will be a gamble as to whether it will hold or break over time.

Cut out
The cut out is where the spray paint goes! You should always check that this area is going to be large enough for the pigment to get through.

Here are some simple examples we have cut on our machine next to a ruler so you can get an idea of the sizing. Here the bridging is around 1mm on the flower and text. The material pictured is Mylar which is perfect for stencilling as it is a flexible plastic that can be wiped clean. It is 0.19mm thick. (190 micron).
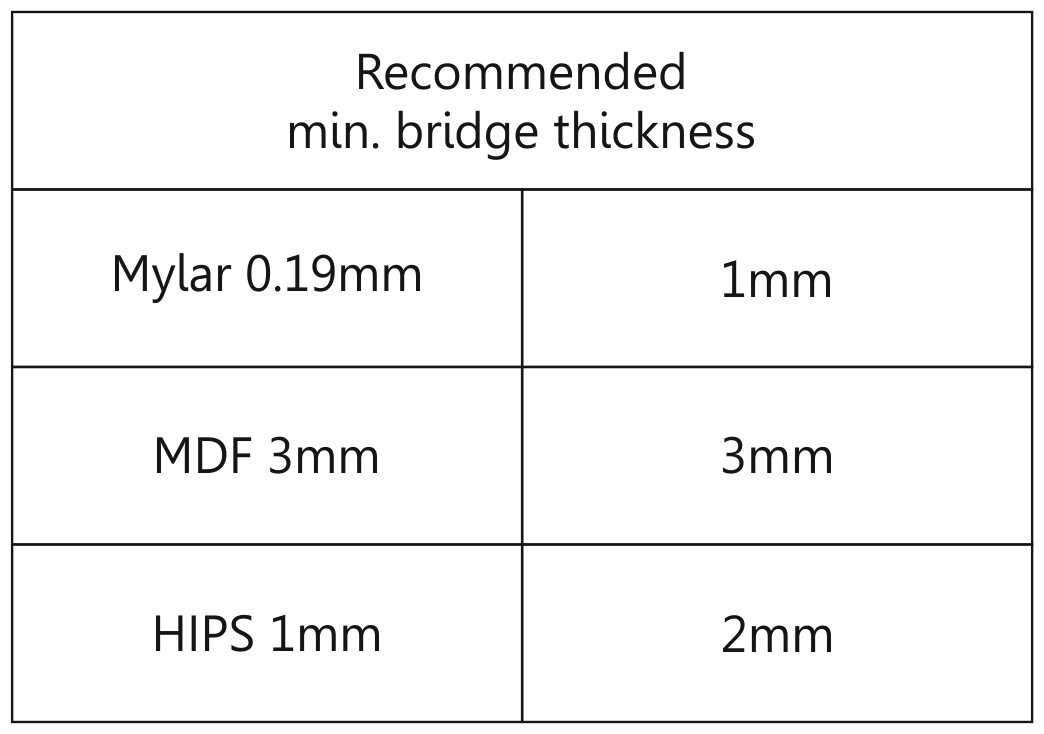
Here's a quick guide to sizes of bridging we recommend.